Today I want to deepen the configuration of an SFTP server for Windows talking about public key authentication.
Bitvise SSH Server, which we talked about in a previous post, is able to manage both kind of user authentication:
- Authentication with username and password
- Authentication with username and a public key
In the example discussed in the previous post we used the first kind of user authentication.
But how it works and when should you use public key authentication in your SFTP server? And how can you configure Bitvise to use it?
Public key authentication is based on a pair of keys called “public key” and “private key”. These keys are generated by the computer, and so is much harder to guess them than a simple password.
Given that no system is inviolable, I believe that public key authentication provides a higher level of security than password authentication, and is commonly used when you have to make automated SFTP transfers.
Keep the following points in mind:
- using public key authentication in SSH is not the same as using an X.509 certificate to protect an HTTPS connection: the latter is used to verify the identity of the server host and to encrypt communication to and from a website
- don’t confuse client authentication keys with server authentication keys: they are two different things, and we will talk about it in a future post
Step 1: generate your private key / public key keypair
First of all, you need a tool to generate the private key / public key keypair. There are many tools to do this job, and for example you could use Bitvise SSH Client, downloadable at this url.
Note that this step is usually made by the person who wants to connect to your server. He has to generate his own private key / public key pair and send to you only the public key, that you have to save in your server (we will see in a moment how…). The private key, as the name implies, must be kept secret and used to configure the client access (we will also see this…). The person who access your server don’t have to send to you his own private key.
Once you completed the download, execute the installer.
You will see the following window.
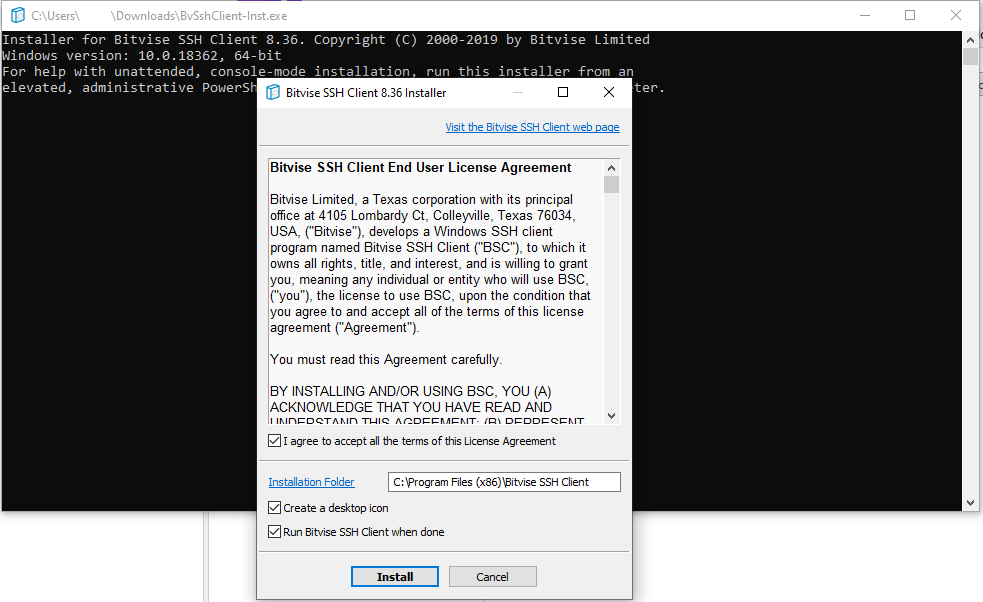
Click on the button “Install” to proceed with the installation.
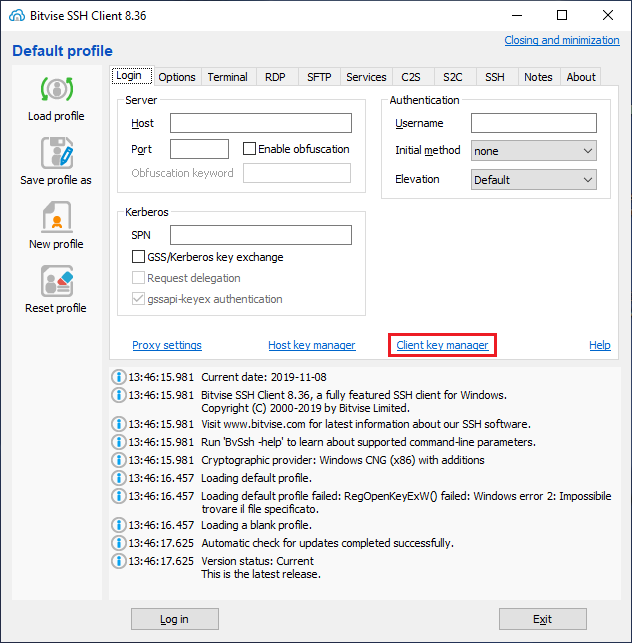
Click on “Client key manager” to open the window that allow you to manage your keys.

Click on the button “Generate new” to generate the new key pair.
In the following form select the key options and the passphrase.

Click on the button “Generate”.
The key list will be updated with the keypair you just created, as you can see here.
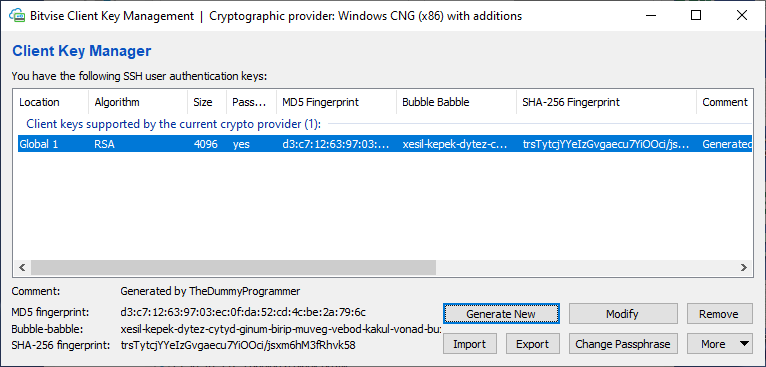
Now you have to export the keys in order to install in your SSH server and configure the SFTP client.
So click on the button “Export”. The following window will appear:
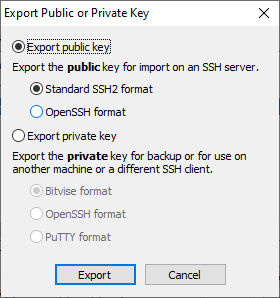
Select the options “Export public key” and “Standard SSH2 format” and click the button “Export”.
You will be prompted with the Windows file dialog to save the file. Save the file in a folder on your PC.
Now, since we need to export also the private key, click the button “Export” again.
Configure the export form as follow:

Using “PuTTY format” allows you to import the key in FileZilla client without making any key format conversion (we will see FileZilla client configuration in a moment…). Note that you will be asked
Click the button “Export”.
The following form will appear:

Export the key without entering an export passphrase.
Congratulations! You just created your own private key / publick key pair!
Now it’s time to go to server side…
Step 2: import the public key into the SFTP server
Now it’s time to associate the public key to an SFTP server user.
In order to do this, load the “Bitvise SSH Server Control Panel”: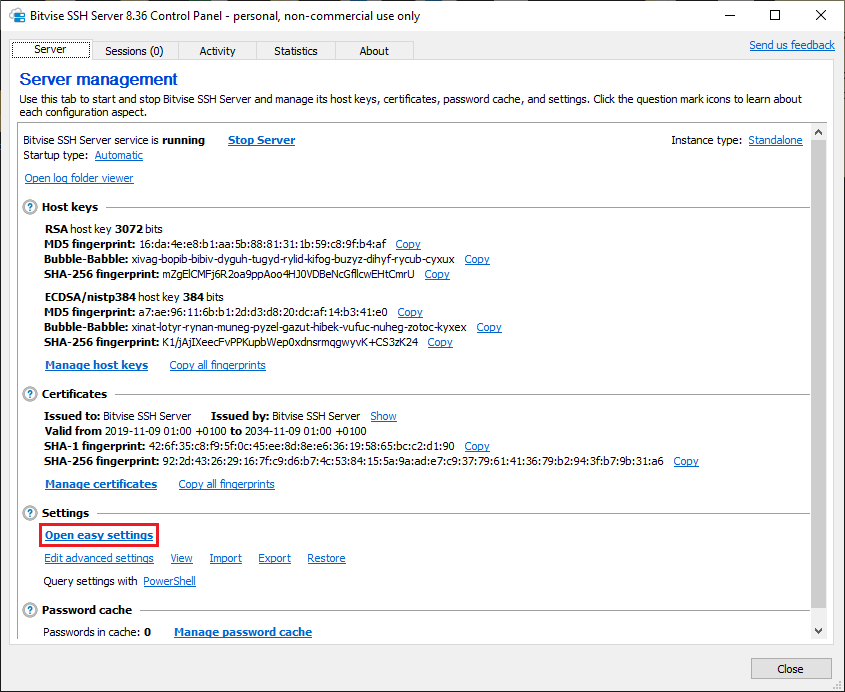
We assume that you have already created a user in your server, so now you only need to associate the public key to that user.
Click on the button “Open easy settings”.
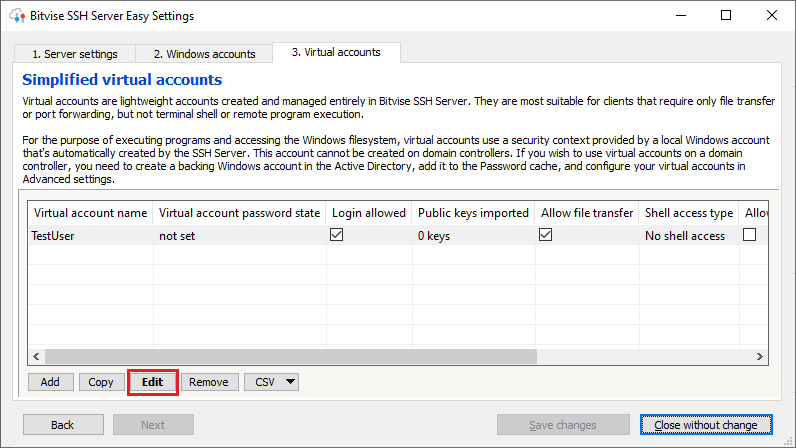
Select the user you want associate the public key and press the button “Edit”.
Here is the user detail window:
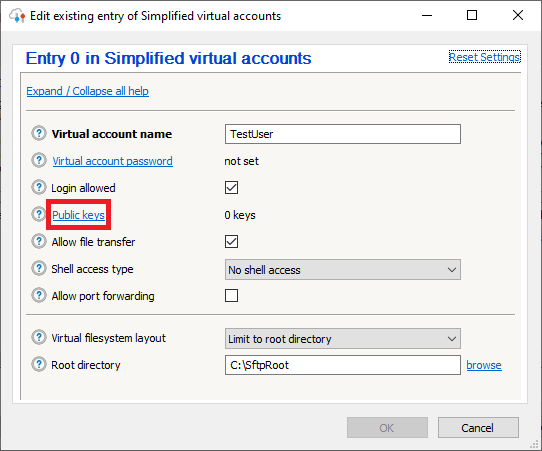
Click on the button “Public keys”. A window with all the user’s keys will appear.

Click on the button “Import”. The standard Windows file dialog will appear. Select the public key file you saved above.
After the key import, the form will appear as follow:

Click the button “Close”.
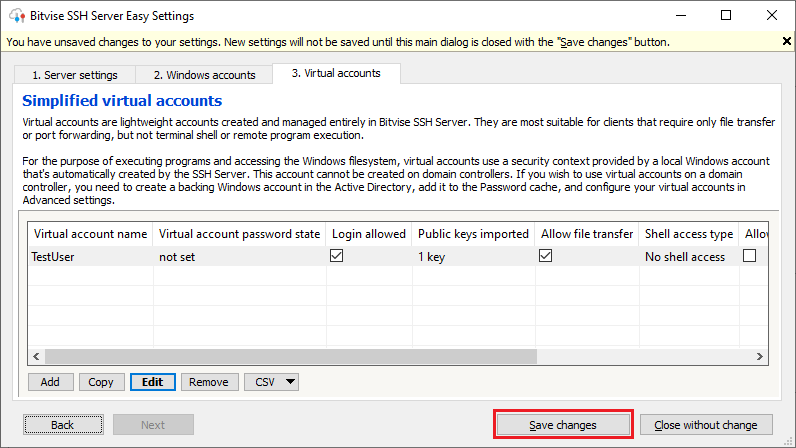
Remember to click the button “Save changes”, to commit the import of the public key.
Step 3: configure the private key in FileZilla client
Now we are ready for the last step: configure an SFTP client with the private key.
Obviously it could also be used Bitvise SSH Client to make an SFTP file transfer, but I want you to show how you can configure FileZilla client to do the same job.
I assume that FileZilla client is already installed on your PC, so it’s time to load it.

Click the button highlighted in red and configure the access for an SFTP host in the following way:
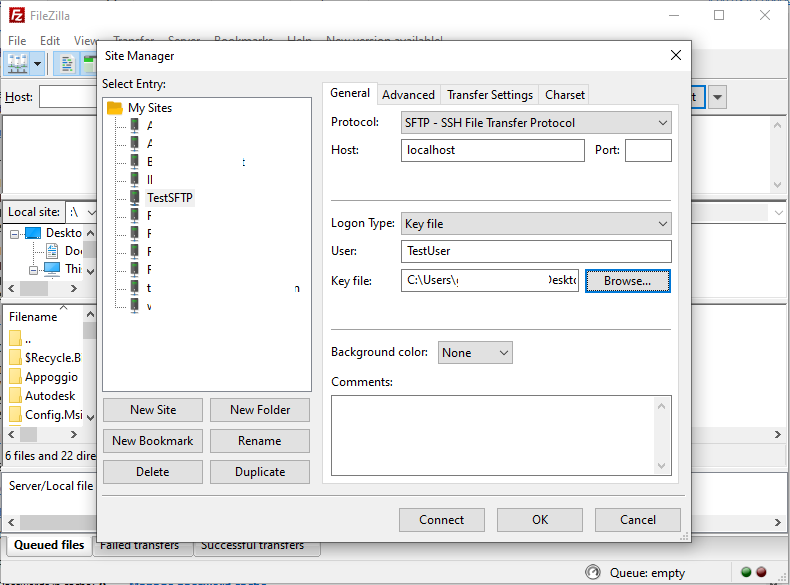
Attention that the “Host” field must contain your SFTP ip address or host name. In the example I use “localhost” because I have the client and the server in the same machine.
Click the “Browse” button and select the private key file you just exported.
Here you can see the result if you click the button “Connect”.
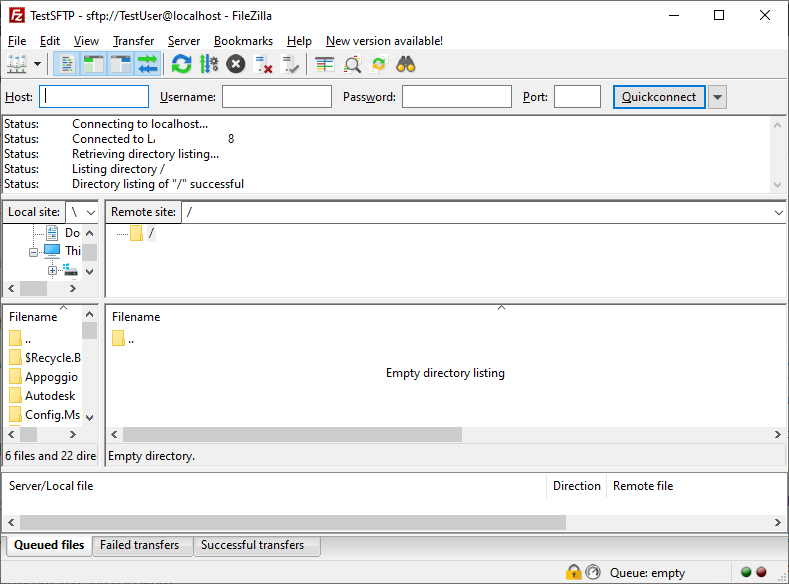
Now you can start your file transfer!!