Introduced with C# 5.0, the async / await pattern was born with the intention of simplifying asynchronous programming. You can find these keywords in many programming language, but in this post we will specifically talk about C#’s implementation.
Let’s start by creating a simple Windows Forms applications to do some tests (click here to download the full source code). In the Main function created by Visual Studio, put the following line of code that will print the current thread ID:
static void Main()
{
    System.Diagnostics.Trace.WriteLine("Main()->Thread ID: " + System.Threading.Thread.CurrentThread.ManagedThreadId.ToString());

     ...
     ...
}
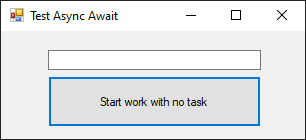
Add a new form to the application, and inside the form insert a textbox and a button, as you can see in the following screenshot:

Now create a click event handler for the button “Start work with no task” containing the following code:
private void BtnStartWorkNoTask_Click(object sender, EventArgs e)
{
  System.Diagnostics.Trace.WriteLine("BtnStartWorkNoTask_Click()->Thread ID: " + System.Threading.Thread.CurrentThread.ManagedThreadId.ToString());

  for (int i = 0; i < 100000000; i++)
  {
    TxtCounter1.Text = i.ToString();
  }
}
If you run the application and press the button “Start work with no task” you will notice that the textbox is not updated with the value of the variable “i”. Moreover the user interface is frozen and, for example, you will not be able to move the window until the count is finished. Why this happens?
The answer is simple: as you can see in the “Output” window of Visual Studio, in this application we have only one thread (in my case with ID 1):
Main()->Thread ID: 1
BtnStartWorkNoTask_Click()->Thread ID: 1
Since the main thread is busy in the for loop, it cannot respond to any other input from the user, and it cannot even update the window when the textbox value changes.
Now let’s make a small change… add a new button named “Start work with task” and add a click event to the button with the following code:
private void BtnStartWorkTask_Click(object sender, EventArgs e)
{
    Task T = new Task(() =>
    {
        for (int i = 0; i < 10000000; i++)
        {
            MakeUISafeCall(this, () => { TxtCounter1.Text = i.ToString(); });
        }
     });
     T.Start();
}
And here is the definition for the MakeUISafeCall (which we talked about in this post):
private void MakeUISafeCall(Form form, Action act)
{
    if (form.InvokeRequired)
    {
        form.Invoke(act);
    }
    else
    {
         act.Invoke();
    }
}
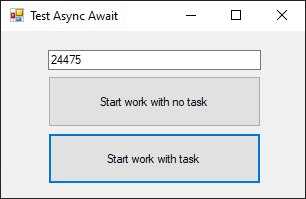
If you click the button “Start work with task”, you can see that the window is correctly updated and movable:

And this is the result of the “Output” window of Visual Studio which demonstrates that a new thread has been created:
Main()->Thread ID: 1
BtnStartWorkNoTask_Click()->Thread ID: 3
The Task object is part of what is called the Task Parallel Library (or TPL) and basically allows you to execute asynchronous or non blocking tasks in your application. You simply have to create a lambda function containing the code you want execute, pass it to Task’s constructor and call the “Start” method.
Now suppose you have to use two long running tasks, and to execute the second task you need the result from the first task. Let’s make another change to the application… Add a third button to the form named “Start work with two tasks (blocking)” and add the following click event handler:
private void BtnStartTwoTasks_Click(object sender, EventArgs e)
{
    System.Diagnostics.Trace.WriteLine("BtnStartWorkTask_Click->Thread ID: " + System.Threading.Thread.CurrentThread.ManagedThreadId.ToString());

    int T1Result;
    Task<int> T1 = new Task<int>(() =>
    {
            System.Diagnostics.Trace.WriteLine("BtnStartWorkTask_Click->Task 1->Thread ID: " + System.Threading.Thread.CurrentThread.ManagedThreadId.ToString());

            System.Threading.Thread.Sleep(5000);

            // Return a 'random' value
            return DateTime.Now.Second;
     });
     T1.Start();
     T1Result = T1.Result;   // We are waiting here and the application is blocked...

     int T2Result;
     Task<int> T2 = new Task<int>(() =>
     {
         System.Diagnostics.Trace.WriteLine("BtnStartWorkTask_Click->Task 2->Thread ID: " + System.Threading.Thread.CurrentThread.ManagedThreadId.ToString());

         System.Threading.Thread.Sleep(5000);

         return DateTime.Now.Second * T1Result;
      });
      T2.Start();
      T2Result = T2.Result;   // Again, we are waiting here and the application is blocked...

      TxtCounter1.Text = T2Result.ToString();
}
To simulate a long running task we use the Thread.Sleep method, which accepts in input the number of milliseconds to wait.
In the code above we used the generic version of the Task class, which allows you to specify the return value type of your task. As you may have noted when T1.Result is called, the entire application is blocked and you can’t even move the window. This happens because the Result property blocks the execution until the task is completed.
But we don’t want this. Yes, to run the second task we need to wait the result from the first task, but we can’t allow the application to be blocked because we could hurt the user experience.
Async / await at last!
I’ll show you in a moment how to rewrite the code above using the async / await keywords… Add another button named “Start work with two tasks and async/await” and the following click event handler:
private async void BtnStartTwoTasksAsyncAwait_Click(object sender, EventArgs e)
{
    System.Diagnostics.Trace.WriteLine("BtnStartTwoTasksAsyncAwait_Click->Thread ID: " + System.Threading.Thread.CurrentThread.ManagedThreadId.ToString());

    int T1Result;
    Task<int> T1 = new Task<int>(() =>
    {
    System.Diagnostics.Trace.WriteLine("BtnStartTwoTasksAsyncAwait_Click->Task 1->Thread ID: " + System.Threading.Thread.CurrentThread.ManagedThreadId.ToString());

    System.Threading.Thread.Sleep(5000);

    // Return a 'random' value
    return DateTime.Now.Second;
    });
    T1.Start();
    await T1;   // We are waiting for task to be completed, but the main thread is not blocked
    T1Result = T1.Result;

    int T2Result;
    Task<int> T2 = new Task<int>(() =>
    {
       System.Diagnostics.Trace.WriteLine("BtnStartTwoTasksAsyncAwait_Click->Task 2->Thread ID: " + System.Threading.Thread.CurrentThread.ManagedThreadId.ToString());

        System.Threading.Thread.Sleep(5000);

        return DateTime.Now.Second * T1Result;
    });
    T2.Start();
    await T2;   // Again we are waiting for task to be completed, but the main thread is not blocked
    T2Result = T2.Result;

    TxtCounter1.Text = T2Result.ToString();
}
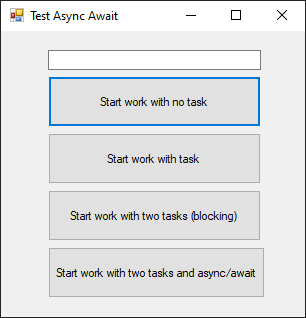
This is the form with the new button:

Now let’s take a look at the new code…
First of all the event handler is marked with the “async” keyword. Pay attention: this doesn’t mean that the method’s code automatically runs in a new thread. You can check this by watching the thread number printed in the output window by the first Trace.WriteLine in the event handler code. The parallel execution is always achieved by the use of the Task object.
Second, note the use of the “await” keywords after the start of the task. Using the “await” keyword basically means “wait the completion of the task, but don’t block the main thread”. And that’s exactly what happens: the code waits for the completion of T1, starts T2 with the result of T1 and, meanwhile, the window still remain responsive!
Of course, you can get the same result without the async / await keywords, but there would have been a lot more work on your part. So we can thank the C# compiler that is doing a lot of work behind the scenes.
In the next post I will show you some other use cases of the async / await keywords…. stay tuned!